In the 2nd part of this tutorial we’ll create the necessary javascript code to make our basic spritesheet component work. For starting from the very beginning, please visit part 1 of the tutorial here.
Step 1: Custom Web Components
First of all it’s important having a look at the basic documentation of the Google Web Designer Help Center about how they build a simple component called myqrcode.js:
/**
 * @fileoverview Implementation of my-qrcode component.
 * @author ksubramanian@google.com (Kishore Subramanian)
 */
if (document.registerElement) {

  var proto = Object.create(HTMLElement.prototype, {

    createdCallback: {
      value:
      function() {
        this.img = null;
      },
      enumerable: true
    },

    attachedCallback: {
      value:
      /**
       * Lifecycle callback that is invoked when this element is added to the
       * DOM.
       */
      function() {
        this.generateImage();
      },
      enumerable: true
    },

    attributeChangedCallback: {
      value:
      /**
       * Lifecycle callback that is invoked when an attribute is changed.
       * @param {string} attributeName Name of the attribute being changed.
       */
      function(attributeName) {
        if (!this.img) {
          // It is possible that the attribute is set before before the
          // component is added to the DOM.
          return;
        }
        switch (attributeName) {
          case 'data':
            this.generateImage();
            break;
        }
      },
      enumerable: true
    },

    generateImage: {
      value:
      function() {
        var data = this.getAttribute('data');
        if (data) {
          if (!this.img) {
            this.img = document.createElement('img');
            this.img.style.height = '100%';
            this.appendChild(this.img);
          }
          this.img.setAttribute('src', QRCode.generatePNG(data));
        }
      }
    }
  });

  document.registerElement('my-qrcode', {prototype: proto});
}
Starting from here, creating our own component is very easy. But first of all, let’s have a look, what they’re are doing there:
You may wonder about the tag name, which is not a usual div or another well known good old HTML tag but a custom one. This looks weird, but actually it’s real HTML or better: it’s a sneak preview of HTML of the future. Actually it’s already kind of standard, but only a few developers are using them yet, although custom elements are having great advantages.
For a better understanding about custom elements, I’d suggest having a read of Eric Bidelmans great article „Custom Elements„, where he also explains the basic functions createdCallback, attachedCallback, detachedCallback and attributeChangedCallback. A perfect web component would make use of any of them but we want to keep pur GWD component – which actually is nothing else than a custom web component – as simple as possible. By the way: for browsers not supporting custom elements, GWD automatically adds a polyfill fallback.
You may also wonder, what the Boolean enumerable means in this case. This attribute is set to false by default when used with createObject(). When set to true, you are able to crawl through the objects‘ properties with the following code:
for (var prop in obj){
  console.log(prop, obj[prop]);
}
You never know, when you or your GWD component user may need it, so why not set to true in this case?
From all objects‘ callbacks, attachedCallback is the most important one, because this is the point, where everything gets initialized. Here a custom function (generateImage in this case) is called. As we want to create a basic sprite sheet component, in this function we’ll create a canvas, load the sprite sheet image and copy the clip from the source image to the canvas according to the provided coordinate sX, sY, sWidth and sHeight.
To keep the code as small as possible and although it would be nicer having an extra js file for this custom code, I’ll add the whole code into spritesheet.js. For larger code sections I strongly advise you to put the component specific code with all the functions into an external file and reference it through javascript (and in the manifest.json file).
Step 2: Creating our own code
For our own sprite sheet component, we rename the generateImage() to generateSpritesheet() and add the following code:
generateSprite: {
  value: function () {
if (!this.canvas) {
      // getting component size
      this.componentWidth = parseInt(window.getComputedStyle(this, null).getPropertyValue("width"));
      this.componentHeight = parseInt(window.getComputedStyle(this, null).getPropertyValue("height"));
// getting parameters from component options
      // getting url of sprite sheet
      this.imageUrl = this.getAttribute('image');
      // getting x- and y-position, width and height of selected sprite in sprite sheet
      this.sX = parseInt(this.getAttribute('sX') || 0);
      this.sY = parseInt(this.getAttribute('sY') || 0);
      this.sWidth = parseInt(this.getAttribute('sWidth') || 64);
      this.sHeight = parseInt(this.getAttribute('sHeight') || 64);
      // getting scale mode
      this.sScale = this.getAttribute('sScale');
      // generate canvas within component on stage
      this.canvas = document.createElement('canvas');
      // setting scale factor, according to sScale from component options
      if ((this.sScale === '') || (this.sScale === 'original size')) {
        // original size
        this.canvas.style.width = this.sWidth + 'px';
        this.canvas.style.height = this.sHeight + 'px';
      } else if (this.sScale === 'stretch to component') {
        // stretch to exact component size
        this.canvas.style.width = "100%";
        this.canvas.style.height = "100%";
      } else if (this.sScale === 'fit to component') {
        var ratioW = this.componentWidth / this.sWidth;
        var ratioH = this.componentHeight / this.sHeight;
        // smaller ratio will ensure that the image fits in the view
        var ratio = ratioW < ratioH ? ratioW : ratioH;
        this.canvas.style.width = (this.sWidth * ratio) + "px";
        this.canvas.style.height = (this.sHeight * ratio) + "px";
      }
      // apply size to canvas
      this.canvas.width = this.sWidth;
      this.canvas.height = this.sHeight;

      // add canvas to component area
this.appendChild(this.canvas);
      // load source image
      this.sourceImage = new Image();
      // after loading, copy image clip to canvas
      this.sourceImage.addEventListener("load", function (e) {
        // get context of canvas
        var context = this.canvas.getContext('2d');

        // copy image clip to canvas
        context.drawImage(this.sourceImage, this.sX, this.sY,
                                            this.sWidth, this.sHeight,
                                            0, 0,
                                            this.sWidth, this.sHeight);
        // free memory
        this.sourceImage = null;
      }.bind(this));
      // assign image url to image object after load-handler to avoid caching issues
      this.sourceImage.src = this.imageUrl;
    }
  }
}
So, what are we doing here?
First we get the size of the component, that has been dragged on the stage. This is important for our scaling option later.
Then we fetch the url of the sprite sheet source image and the specified size data for the clip sX, sY, sWidth and sHeight. To avoid problems when the user is adding a „px“ behind the value, we handle them as String and parse them to Integer. If there is an issue with, e. g. the user has not specified the value yet, then we provide a fallback value, which is 0 for the clip origins sX and sY and define 64 pixels for sWidth and sHeight.
Finally we get the sScale parameter and after creating the canvas (in the background, not visible yet) we define the inner size according to the provided scaling options. Remember that a canvas is having two pixel sizes:
- Canvas Pixel Size (canvas.width, canvas.height):
This is the number of pixels, which an undistorted and unscaled canvas contains in width and height. - Canvas CSS Size (canvas.style.width, canvas.style.height):
This is the size, how those pixels are set into the DOM and on the screen.

25 px circle on a 50 x 50 canvas
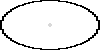
25 px circle, still on a 50 x 50 canvas but stretched to 100 px width
Imagine having a canvas with 50 x 50 Pixels size. If you draw a circle at the center with a radius of 25 Pixels on it, it will fill the whole canvas. If the CSS Size is now 100 px in width and 50 px to its height, then you won’t automatically have a higher resolution of the original canvas, but the 50 pixels (width) will be scaled by factor 2 to 100 pixels. The result will be an ellipse, which is double the width than its height. For increasing the number of pixels, you’ll need to set canvas.width = 100 instead.
So a canvas shows the same behavior as an image, actually a canvas is an image without content, which we are able to design on our own. This behavior is of great help for our scaling options now:
- for ‚original size‚, we just set the width and height of the canvas(!) to sWidth and sHeight. It will always have the same size independent from the component size.
- for ‚stretch to component‚ this is very easy: we just set the canvas size to 100% width and height, so that the canvas may look distorted.
- for ‚fit to component‚, we calculate the maximal size, so that it fits into the component without being cropped and set the canvas(!) size to the new values.
After calculating the canvas size, we set the inner size (canvas.width and canvas.height), which will always be sWidth and sHeight.
Before we set the canvas into the component with appendChild(), then finally we want to load the source image. For that we’ll need an eventListener for the load event. Please be aware, that we need to bind our components‘ object this to the function, otherwise this will refer to the loaded object and cause some errors.
this.sourceImage.addEventListener("load", function (e) {
  // get context of canvas
  var context = this.canvas.getContext('2d');
  // copy image clip to canvas
  context.drawImage(this.sourceImage, this.sX, this.sY,
                                      this.sWidth, this.sHeight,
                                      0, 0,
                                      this.sWidth, this.sHeight);
  // free memory
  this.sourceImage = null;
}.bind(this));
We simply just get the context of the (empty) canvas for being able to draw the clip in the next line with drawImage(). Finally we clear the image source to get rid of some valuable memory by assigning null.
After that, we finally set the source url of the sprite sheet component. Why don’t we set it before initializing the load handler? The reason is, that in some old browsers it may happen that images won’t call the load handler, if the browser already knows the image and has it cached before. By defining the source later, we can avoid that issue.
Actually, that’s it. Very easy, isn’t it?
Luckily we don’t need to create our own sprite sheet component as with version 1.5 Google Web Designer (released 17th of November 2015) comes with a great native sprite sheet component, which comes up with some awesome additional features like animation.
In the upcoming tutorial following within the next weeks, we’ll learn how to create custom GWD events and how to implement custom methods. Stay tuned.
Appendix: Download Source Code
Don’t want to copy’n’paste all the code? Just download the GWD project files here.